Overview
Curved girder analysis is not easy like straight girders, and only limited software can handle this problem. Dr. Watanabe developed a full influence line theory for three-span continuous curved girders. The detailed theory is quite interesting, but only the methodology of how to use his methods is discussed in the article. His methods give an exact solution for a symmetric three-span curved girder, and the warping effects are not included. As always, start with an example. The input and output are self-explanatory and detailed discussion is not provided.
Input
Dr. Watanabe's method requires only five inputs.
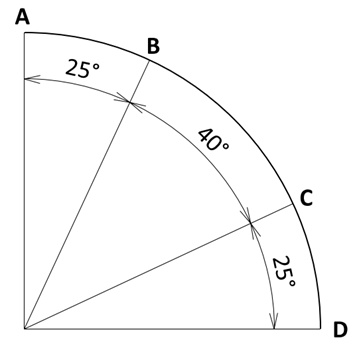
Side span angle = 25°
Center span angle = 40°
Side span stiffness ratio

Center span stiffness ratio

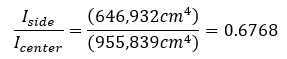
Moment of inertia ratio
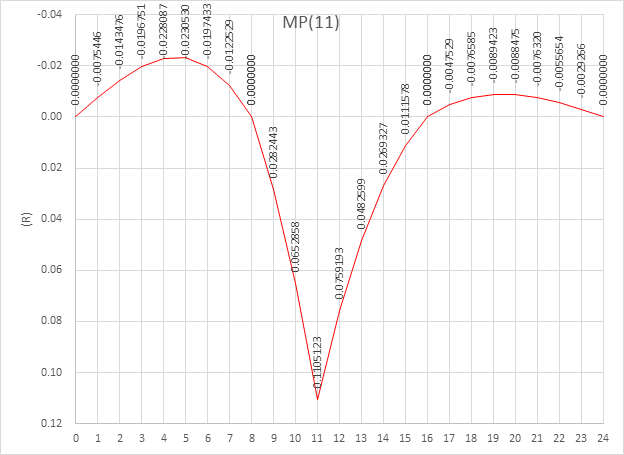
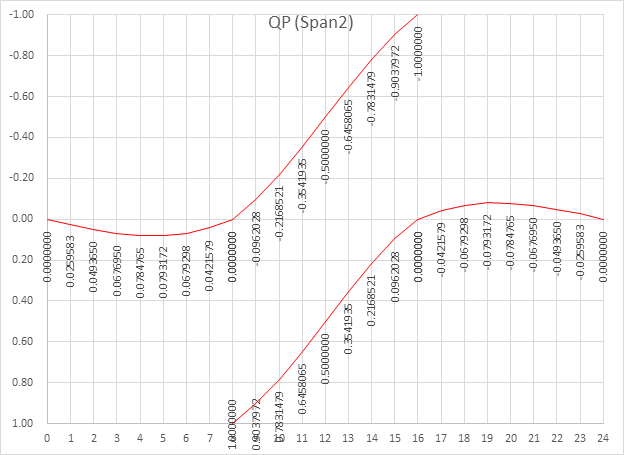
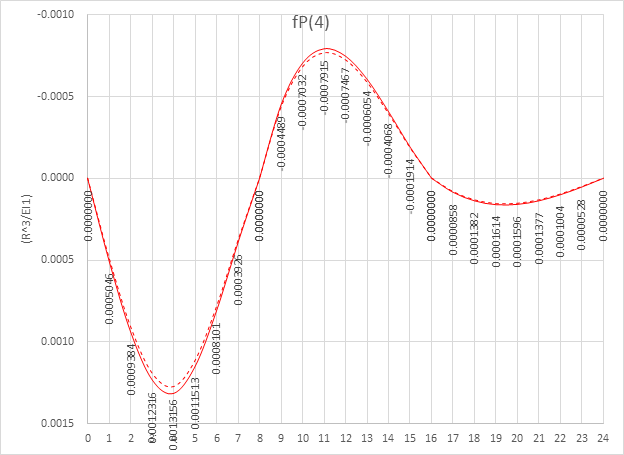
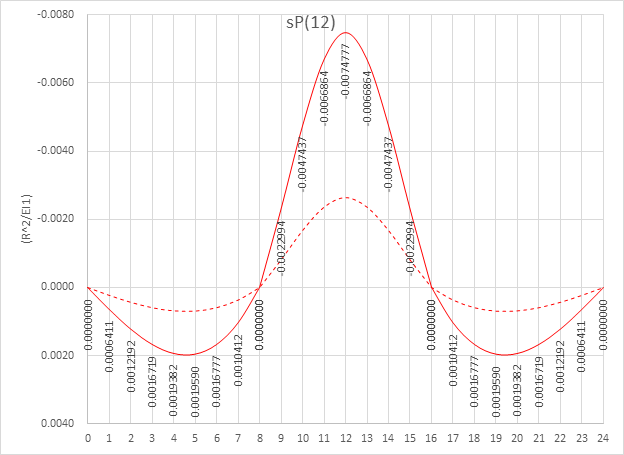
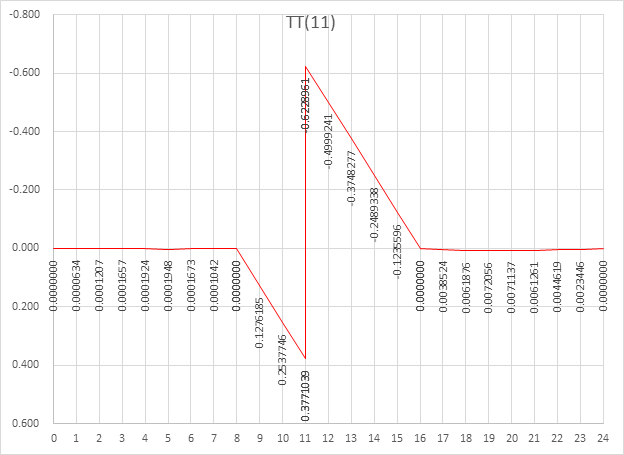
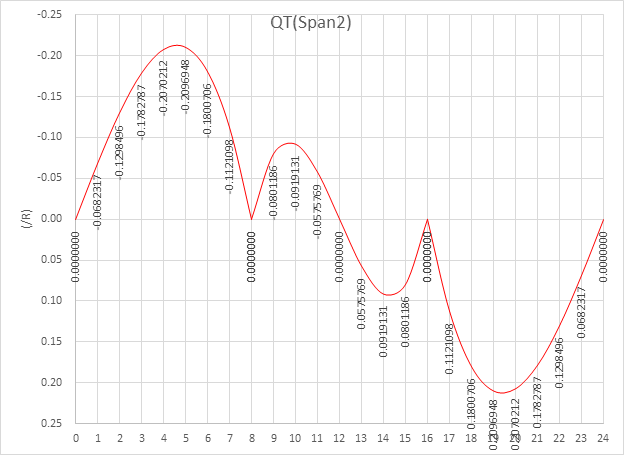
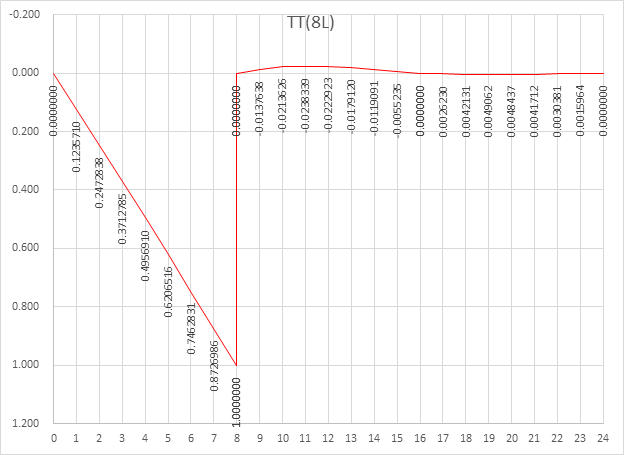
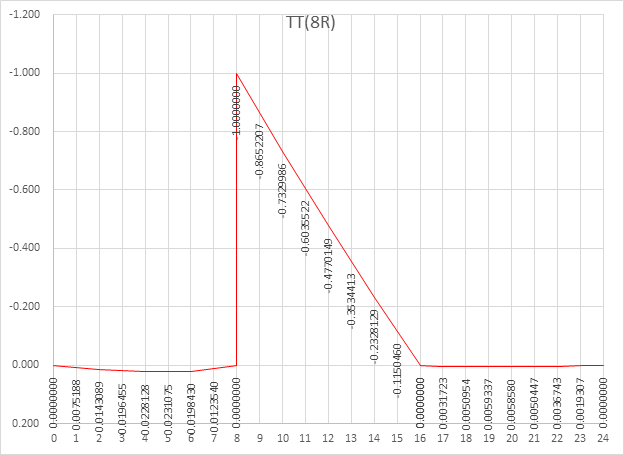
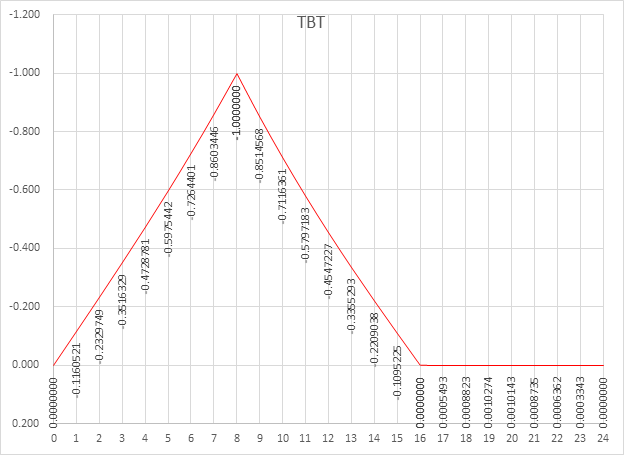
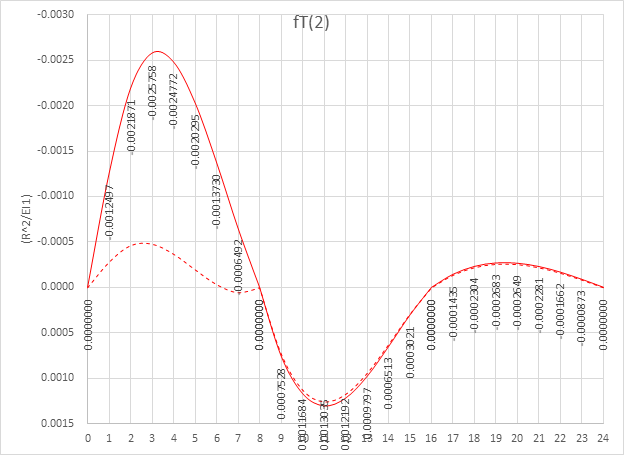
Influence line due to point load
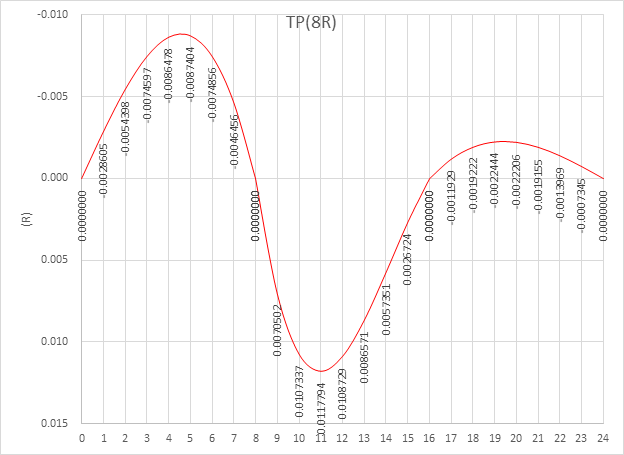
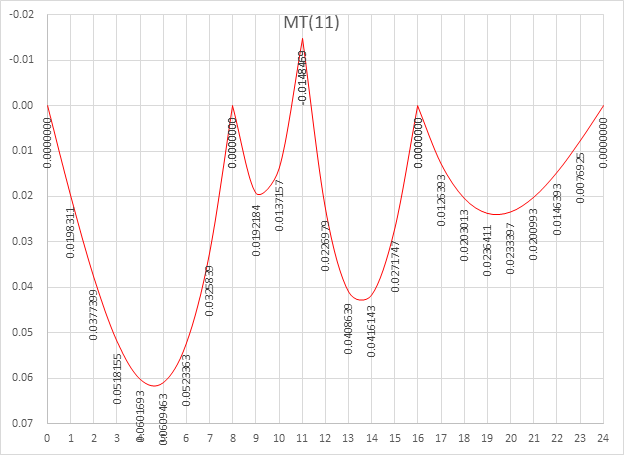
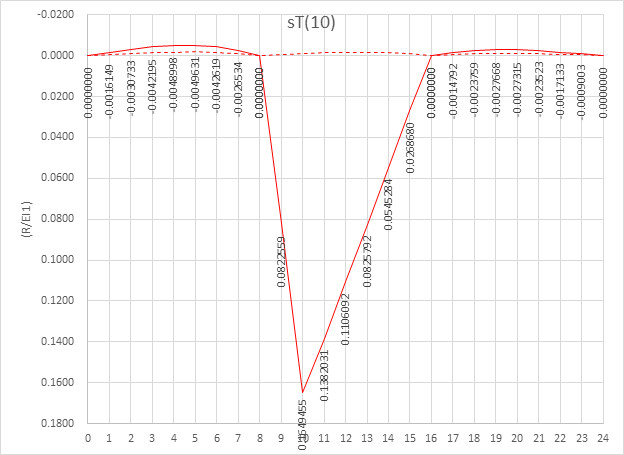
Influence line due to torsional moment
Download Full Analysis Result [Click]

He is a Senior Supervising Engineer with a high level of expertise in the design and analysis of suspension bridges. He has a solid fundamental understanding of structures and can apply his knowledge exceptionally well to the design and analysis of highly complex structures. He is also a strong communicator, able to identify and distill the key information that is relevant to the task at hand and present it in a clear and quickly understandable manner.

![Design and Practical Examples of Baseplates and Anchor Rods [sample download]](https://2495902.fs1.hubspotusercontent-na1.net/hubfs/2495902/%EC%8D%B8%EB%84%A4%EC%9D%BC22.png)
![Understanding Drafting Standards [ Drawing download ]](https://2495902.fs1.hubspotusercontent-na1.net/hubfs/2495902/%EC%8D%B8%EB%84%A4%EC%9D%BC24.png)
![Key Changes in ACI 318-19: A New Standard for Structural Design [ PDF download]](https://2495902.fs1.hubspotusercontent-na1.net/hubfs/2495902/%EC%8D%B8%EB%84%A4%EC%9D%BC21-1.png)
![Design and Practical Examples of Lug design(ASME BTH-1) [sample download]](https://2495902.fs1.hubspotusercontent-na1.net/hubfs/2495902/%EC%8D%B8%EB%84%A4%EC%9D%BC20-1.png)